Mailing Wedding invitation Etiquette
Navigating the ins and outs of wedding etiquette can feel overwhelming, but when it comes to your invitation etiquette, it’s all about a few key details.
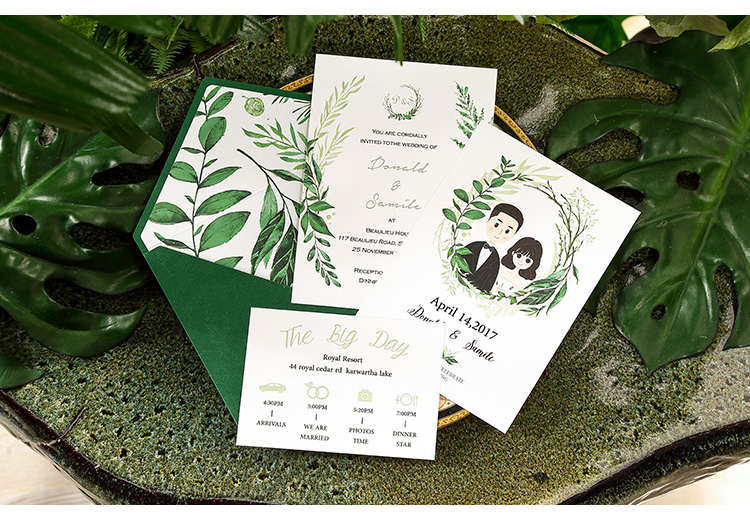
You’ve likely invested time and money into choosing the perfect wedding stationery suite, so you want to make sure it arrives in your guests’ hands looking just as beautiful as it did when you picked it out.


From timing your send-out to assembling each piece correctly, these tips will help you manage the process smoothly. Think of this as your essential cheat sheet for addressing, assembling, and mailing your wedding invitations like a pro.
Master Wedding Invitation Etiquette in 7 Simple Steps
Timing Is Everything: When to send wedding invitations
Getting organized about a month before you want to send your invitations is a great idea. The ideal time to mail your invitations is six to eight weeks before your wedding day. This gives guests enough time to clear their calendars and, more importantly, gives you a solid headcount a week or two before the event.
Hire a Calligrapher or DIY?
Your wedding invitations set the tone for your entire event, and the envelope is the first thing guests will see. Depending on your wedding’s formality and your own handwriting skills, you might want to hire a professional calligrapher. They can elevate the look of your envelopes and ensure a polished, cohesive feel.
If you choose to hire one, be sure to provide them with your complete guest list, including full names, addresses, and any titles (Mr., Dr., etc.). Start compiling this list early, as confirming addresses and spellings can take some time. Many calligraphers need two to three weeks, or even more, to complete a project, so factor that into your timeline.
The Rules of Addressing: Proper way to address wedding invitations
While modern etiquette has become more relaxed, a few traditional rules for addressing envelopes will show your guests you’ve put thought into every detail.
- Full Names and Titles: Always use your guests’ full names on the outer envelope—no nicknames or initials. Use appropriate social titles like Mr. and Mrs., and spell out suffixes like “Junior” or “the Fourth.”
- No Abbreviations: Spell out all words in an address. This includes street types (Street, Avenue, Boulevard), city and state names (Saint Paul, Minnesota), and house numbers under 20 (Eleven versus 11).
- Return Address: The return address should also have all words spelled out. Traditionally, it’s placed on the back flap of the outer envelope.
The Two-Envelope System
You may notice that some invitation suites come with an inner and outer envelope. The outer envelope is for the postal service and can get a bit worn during transit. The inner envelope is meant to protect the invitation and its contents, ensuring they arrive in pristine condition.
The inner envelope is also a great place to specify exactly who is invited. On the outer envelope, you would address the household (e.g., “Mr. and Mrs. Smith”). On the inner envelope, you can list the names of all invited guests in that household, including children (e.g., “Mr. and Mrs. Smith, John, and Jane”).
If you prefer a simpler approach, a single envelope is perfectly acceptable and a common choice today.


Assembling the Suite: How to assemble a wedding invitation suite?
There’s a specific order to how you should stack all the pieces of your invitation suite.
- Start with the invitation on the bottom, with the text facing up.
- Next, stack any other enclosures, like the reception card or a map, in order of size, from largest to smallest.
- The reply card and its pre-stamped, addressed envelope should be placed on top of the stack, with the reply card tucked under the envelope’s flap.
- Insert the entire stack into the inner envelope, making sure the text on the invitation is facing up so your guests see it right away.
- Finally, slip the unsealed inner envelope into the outer envelope with the names facing the back flap.
Postage and Hand-Canceling
Don’t just slap a standard stamp on your envelopes. Take a completed invitation to the post office and have it weighed. Wedding invitations are often heavier than a standard letter, and you want to be sure you have the correct postage. Be sure to weigh your reply card and its envelope, too, so you know how much postage to put on those.
For an extra touch, consider requesting hand-canceling. This is when a postal worker manually marks each stamp instead of using a machine. It prevents the heavy machinery from damaging your beautiful paper goods and keeps your invitations looking their best.
A Unique Postmark
For a truly memorable touch, you can have your invitations postmarked from a town with a romantic name. Some popular options include Bliss, New York, Romance, Arkansas, and Lovely, Kentucky.
To do this, you’ll need to contact the postmaster in your chosen town in advance. Then, you’ll mail your stamped, addressed invitations to that postmaster, along with a note detailing your request. They will apply the special postmark and send them out. It’s a small detail that can add a fun, personalized element to your wedding stationery.
Did any of these tips surprise you?
Related Post:
Elevate Your Wedding with Personal Wedding Monograms
7 Fresh Takes on Wedding Invitations 2025
Eight Details Should Be Included on Your Wedding Invitation