Save Time & Money: Easy DIY Wedding Invitations from Start to Finish
Planning a wedding can quickly become expensive, but your wedding invitations don’t have to break the bank.
With a little creativity and the right tools, you can create stunning DIY wedding stationery that looks professionally designed while saving hundreds—even thousands—of dollars.
This guide will walk you through everything you need to know, from choosing the right tools to creating a complete invitation suite and coordinating day-of details.
Essential Tools and Resources for DIY Wedding Invitations Stationery
Wedding Cards Design Software
Canva is your best friend for DIY wedding invitations.
This free online design platform offers thousands of wedding invitation templates that you can customize to match your vision. Even if you have zero design experience, Canva’s drag-and-drop interface makes it easy to create professional-looking invitations in minutes.
The premium version (Canva Pro) unlocks additional fonts, graphics, and the ability to resize designs instantly, which is helpful when creating matching save-the-dates, programs, and thank-you cards.
Other design options include Adobe Express (formerly Adobe Spark) for free, or Adobe Illustrator and InDesign if you’re more design-savvy and want complete creative control.
Paper Selection: wedding invitation paper types
The paper you choose dramatically impacts the final look and feel of your invitations. Here are the main options:
- Cardstock is the most popular choice for DIY invitations. Look for 80-110 lb cardstock for invitation cards and 65-80 lb for inserts. Linen, felt, or shimmer finishes add texture and elegance. You can find quality cardstock at craft stores like Michaels, Hobby Lobby, or online retailers like Paper Source and Cards & Pockets.
- Specialty papers like vellum overlays, kraft paper, or handmade cotton paper can add unique character to your invitations. Vellum works beautifully as a translucent overlay, while kraft paper gives a rustic, organic feel.
- Acrylic as one of the hottest trends for wedding plan now, acrylic wedding invitations are still up and coming style that your guests are not likely to have seem before.
- Pre-cut invitation kits are available if you want to skip the trimming step. Many come with matching envelopes and pre-scored cards for easy folding.


Printing Options
Home Printer: An inkjet or laser printer can handle most invitation projects. Laser printers produce crisp text and work well with heavier cardstock, while inkjet printers offer better color saturation for photo-heavy designs. Make sure your printer can handle the paper weight you’ve chosen (check your printer’s manual for maximum paper thickness).
Professional Printing Services: For a more polished finish, consider using online printing services like Catprint, Minted, or your local print shop. Upload your Canva design as a PDF, and they’ll print on high-quality paper with professional equipment. This option still saves money compared to traditional wedding stationers while giving you premium results.
Other Helpful Tools for Wedding Invitation DIY
- Paper trimmer with a scoring blade for clean, straight cuts
- Bone folder for crisp, professional-looking folds
- Corner rounder for softened edges
- Adhesive: double-sided tape, glue dots, or wax seals
- Envelope moistener to save your tongue from 100+ licks
- Postage scale to ensure proper postage
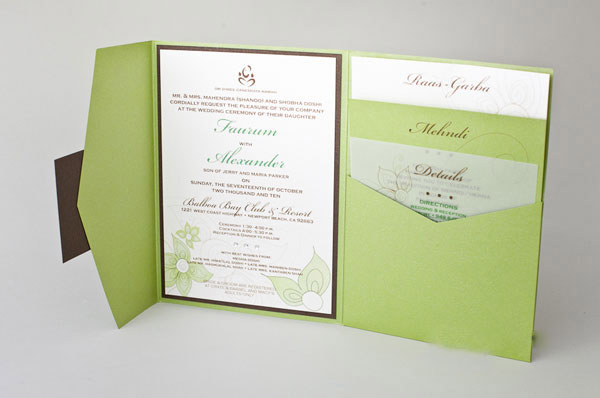
DIY Your Invitation Suite: Step-by-Step Guide
Step 1: Plan Your Suite Components
A basic invitation suite includes:
- Main invitation card
- RSVP card (or digital RSVP via QR code)
- Details card (directions, accommodation info, wedding website)
- Outer envelope
- Optional: inner envelope, belly band, vellum overlay, or wax seal
Step 2: Design Your Invitation
Open Canva and search for “wedding invitation” templates. Choose one that matches your wedding style—romantic and floral, modern and minimalist, rustic and organic, or classic and elegant. Customize the template with your information:
- Names of the couple
- Date and time
- Venue name and address
- Dress code (if applicable)
- Your color scheme and fonts
Pro tip: Stick to 2-3 fonts maximum for a cohesive, professional look. Pair a decorative script font with a clean sans-serif or traditional serif font.


Step 3: Add a QR Code for Digital RSVPs
Here’s where you’ll save significant money on postage and printing.
Instead of including traditional RSVP cards with return envelopes (which require additional postage), create a QR code that links to your wedding website’s RSVP page.
How to create a QR code:
- Set up your wedding website with an RSVP form (use free platforms like The Knot, Minted, or Zola)(Continue to Read: Best Wedding Website for Your Big Day)
- Copy the RSVP page URL
- Use a free QR code generator like QR Code Generator or QR Code Monkey
- Download the QR code as a PNG file
- Upload it to Canva and add it to your details card or directly on your invitation
Include text like: “Please RSVP by [date] by scanning the code below or visiting [your website URL]”
This approach is increasingly common and accepted, especially for couples with tech-savvy guest lists. You’ll save on printing RSVP cards, return envelopes, and postage stamps—easily $50-150 depending on your guest count.
Step 4: Create Matching Suite Pieces
Use Canva’s “resize” feature or create new designs that match your invitation’s fonts, colors, and style for:
- Details card with ceremony and reception information, parking details, and hotel recommendations
- Weekend itinerary card (if you’re having multiple events)
- Thank-you cards for later use
Step 5: Print and Assemble
Printing tips:
- Print a test copy first to check colors, alignment, and paper compatibility
- Print in small batches to avoid wasting paper if something goes wrong
- Allow ink to dry completely before handling (especially important for inkjet prints)
- Print on the correct side of specialty papers
Assembly: invitation assembly tips
- Trim all pieces to size using your paper trimmer
- Layer your suite components in order (invitation on bottom, then details card, RSVP card if included)
- Secure with a belly band, ribbon, or place directly in the envelope
- Add any finishing touches like wax seals or custom stamps
- Address envelopes by hand, print labels, or use calligraphy
Step 6: Postage and Mailing
Before buying stamps in bulk, bring a fully assembled invitation to the post office to weigh it. Square envelopes and thick suites require additional postage. Consider buying custom wedding stamps from USPS or vintage stamps from Etsy for an extra special touch.
Mail invitations 6-8 weeks before your wedding date (3-4 months for destination weddings).
(Continue to read: Address, Assemble, and Mail Wedding Invitations Like a Pro )
Creative Place Cards and Menu Ideas
Once your invitations are complete, carry your design theme through to your reception details with these creative ideas:
Natural Place Cards Ideas
Calligraphy on Leaves: Collect large, sturdy leaves like magnolia or lemon leaves.
Clean and dry them thoroughly, then use a white or gold paint pen to write guest names in simple calligraphy. These look stunning on rustic or garden-themed tables and double as natural decor. Press the leaves between books for a few days if they’re very curled.
Painted Stones: Gather smooth river rocks or purchase polished stones in bulk.
Paint them white or leave them natural, then write names with a fine-point permanent marker or paint pen. Guests can take these home as keepsakes. Add a small detail like a tiny heart or your wedding date on the reverse side.
Wood Slices: Small wood slices from craft stores work beautifully for rustic weddings.
Burn names into the wood with a wood-burning tool, or write them with paint pens. Add a small seasonal sprig—like lavender, rosemary, or eucalyptus—tied with twine.
Printed Place Cards
Design matching place cards in Canva using your invitation fonts and colors. Print on cardstock and use these ideas:
- Tent Cards: Classic folded place cards that stand on their own. Print names on the front and table numbers on the back, or add a personal note thanking each guest.
- Flat Cards: Single-layer cards that lay flat on the plate or lean against glassware. Add a small dried flower or ribbon for texture.
- Tag Style: Create luggage tag-shaped place cards with a hole punch and ribbon. These work especially well for travel-themed weddings.
- Photo Place Cards: Include a small photo of you with each guest for a personal touch that doubles as a conversation starter.
Menu Cards
Individual Menus: Print a menu card for each place setting. This works best for plated dinners where guests need to know what they’ve pre-selected. Match the design to your invitations for a cohesive look.
Table Menus: Create larger menu cards (5×7 or 8×10) displayed in frames or on stands at each table. This saves printing costs while still looking elegant.
Menu Boards: For a more casual approach, create a large display board with your menu written in calligraphy or printed on a poster board. Place it near the entrance to the reception space.
Creative Presentations: Print menus on colored or textured paper, roll them like scrolls tied with ribbon, tuck them into napkin folds, or clip them to small wreaths for seasonal weddings.
Pro Tips for Place Cards and Menus
- Create all place cards at once and store them in alphabetical order in a box
- Make 5-10 extras for last-minute additions or mistakes
- Consider printing table assignments on small cards at a welcome table instead of individual place cards to simplify seating
- Use the same paper and printing method as your invitations for continuity
- Test your calligraphy or painting on practice materials first
Final Thoughts: Budget Breakdown
Let’s talk savings. Professional wedding invitations typically cost $3-8 per invitation suite, totaling $300-800 for 100 guests. By going DIY, your costs might look like this:
- Cardstock and paper: $50-80
- Envelopes: $20-40
- Printing (at home or print shop): $30-100
- Embellishments and tools: $30-50
- Postage: $60-150
- Total: $190-420
You’ll save $200-500 or more, plus you’ll have supplies left over for programs, thank-you cards, and day-of stationery.
The DIY approach gives you complete creative control, allows you to work at your own pace, and creates meaningful stationery that truly represents your unique style. Set aside a few weekends, enlist a friend or two for an assembly party with wine and snacks, and enjoy the process of bringing your wedding vision to life.
Your guests will appreciate the personal touch, and you’ll love the money you’ve saved for your honeymoon, photographer, or dream venue. Happy creating!
You May Also Interested In:
Why More Couples Are Taking DIY Wedding?
Creating a Realistic Wedding Budget